
7 Ways to Improve Night Vision on Security Cameras (2026)
Table of Contents
Most night footage is ruined by fixable problems, not by expensive cameras. A 4MP camera with a 1/1.8-inch sensor, an F1.0 lens and a clean dome records usable color in near darkness. The same camera mounted too high, aimed into a streetlight, and fitted with a dusty dome records a grey blur instead. It is left on default gain settings, and the night image collapses. The hardware cost is identical. The difference is how the camera was selected, configured and installed. That gap is why how to improve night vision is the first question our customers ask before ordering.
This guide answers how to improve night vision on security cameras with seven practical fixes, ordered by impact. Each fix covers the method, the principle, the parameters and a before-and-after comparison. Security camera night quality is decided by six things. They are sensor size, aperture, scene lighting, camera settings, maintenance and placement. Apply all seven and a typical 4MP camera can move from unreadable to evidence-grade footage after dark. These seven night vision tips work on cameras you already own, not just new orders. For the deeper trade-off between color and infrared, read our full-color night vision cameras guide.
Keep reading for more!
The Snapshot
- Sensor size comes first: a 1/1.8-inch sensor collects roughly 1.7x more light per pixel than a 1/2.7-inch sensor at the same resolution, so night quality follows the sensor format before any other spec.
- Aperture is free light: an F1.0 lens admits 4x the light of an F2.0 lens, which is usually the difference between a sharp 1/25 second frame and a motion-blurred 1/6 second frame.
- Color beats grayscale for evidence: full-color night vision reaches 20-30 m typical with color detail, while IR at 850 nm reaches 30-60 m but records black and white only.
- Settings cost nothing: tuning shutter speed to 1/25 s, capping gain around 50-70 and enabling WDR and 3D DNR is the fastest free improvement on any existing installation.
- Maintenance and placement decide the rest: a monthly dome clean and a 15-30 degree downward tilt fix more night footage problems than a camera upgrade.
Way 1: Choose a Larger Sensor
The method: Put sensor format above megapixel count when you spec a camera. Demand 1/1.8-inch or larger for outdoor and after-hours scenes. Treat 1/2.7-inch as the entry point. Accept 1/4-inch only for cheap indoor units that never see darkness.
Why it works: The sensor is the light-collecting chip behind the lens. A larger format with the same pixel count means bigger pixels. Bigger pixels capture more photons before the camera must boost gain. More photons means less noise, longer color retention and sharper detail as the light drops. A 5MP camera on a large sensor often sees better at night than an 8MP camera on a small one.
The parameters that matter (typical): A 1/1.8-inch sensor has a diagonal of about 8.9 mm. A 1/2.7-inch sensor measures about 6.7 mm. At 5MP that is roughly 1.7x more pixel area, and the gap widens again at higher resolutions. Minimum illumination claims follow the same curve. 0.01 lux in color is realistic on a large sensor. 0.001 lux claims on small sensors are marketing numbers. If you are buying a better night camera, this single line matters more than the megapixel figure.
The comparison: Take two 5MP cameras in the same 0.05 lux scene. The unit with a 1/2.7-inch sensor shows visible noise and washed-out color. The unit with a 1/1.8-inch sensor keeps clean color down to about 0.01 lux. Same resolution, two very different night images. The difference is printed on the specification sheet.
Way 2: Pick an F1.0 Aperture Lens
The method: Choose an F1.0 lens wherever the scene demands night performance. Use F1.4 or F1.6 as budget fallbacks. Avoid F2.0 or slower lenses on outdoor security cameras.
Why it works: The aperture is the opening that lets light through the lens. The f-number is the focal length divided by the diameter of that opening. A smaller number means a wider opening. Each full stop doubles the light reaching the sensor. The jump from F2.0 to F1.0 is two full stops, or exactly 4x more light.
The parameters that matter (typical): Using F1.0 as the reference, F1.4 admits about 50% of the light. F1.6 admits about 40%, and F2.0 about 25%. On a 5MP full-color camera, F1.0 paired with a 1/1.8-inch sensor delivers continuous color to 20-30 m in zero light. An F1.6 lens in the same housing typically halves the usable range before noise becomes a problem.
The comparison: Put the same sensor behind two lenses at dusk. With F1.0 the camera keeps a 1/25 second shutter and low gain, so a walking person stays sharp. With F2.0 the camera must drop to 1/6 second or raise gain. The result is either motion blur or heavy noise. Aperture is the cheapest night-vision upgrade because it is chosen at the factory.
Way 3: Use Full-Color Night Vision Instead of IR
The method: For scenes where evidence matters, choose full-color night vision cameras instead of IR-only units. Think yards, loading bays and entrances. Full-color cameras combine a large sensor, an F1.0 aperture and built-in white light to record color all night.
Why it works: An IR camera lights the scene with 850 nm or 940 nm LEDs. The sensor records what they reflect, which is always black and white. A full-color camera uses its fill light the way the eye uses a porch light. The sensor therefore records the scene in continuous color. Grayscale footage cannot answer the questions a police report needs. What color was the vehicle? What did the jacket look like? Color footage can answer both.
| Mode | Light source | Typical range | Detail recorded | Best for |
|---|---|---|---|---|
| IR | 850 nm or 940 nm LEDs | 30-60 m | Black-and-white shapes | Total-darkness coverage at distance |
| Full color | F1.0 aperture plus white fill | 20-30 m | Color clothing, vehicles, faces | Evidence-grade scenes near the building |
← swipe to scroll →
The parameters that matter (typical): IR at 850 nm reaches 30-60 m with a faint red glow. 940 nm is invisible to the eye but delivers shorter range. Full-color night vision covers 20-30 m on a fixed camera with an F1.0 lens. That suits most entrances, yards and perimeters. For most sites, switching from IR to full color is the single biggest way to improve night vision.
The comparison: A break-in at 23:00 tells the story. The IR camera records a silhouette that could be anyone. The full-color camera records jacket color, height and vehicle details. The two cameras sit in the same price bracket. The evidence gap is enormous. Our night vision key specs guide breaks down the five numbers that decide this trade-off.
Way 4: Add Fill Light to the Scene
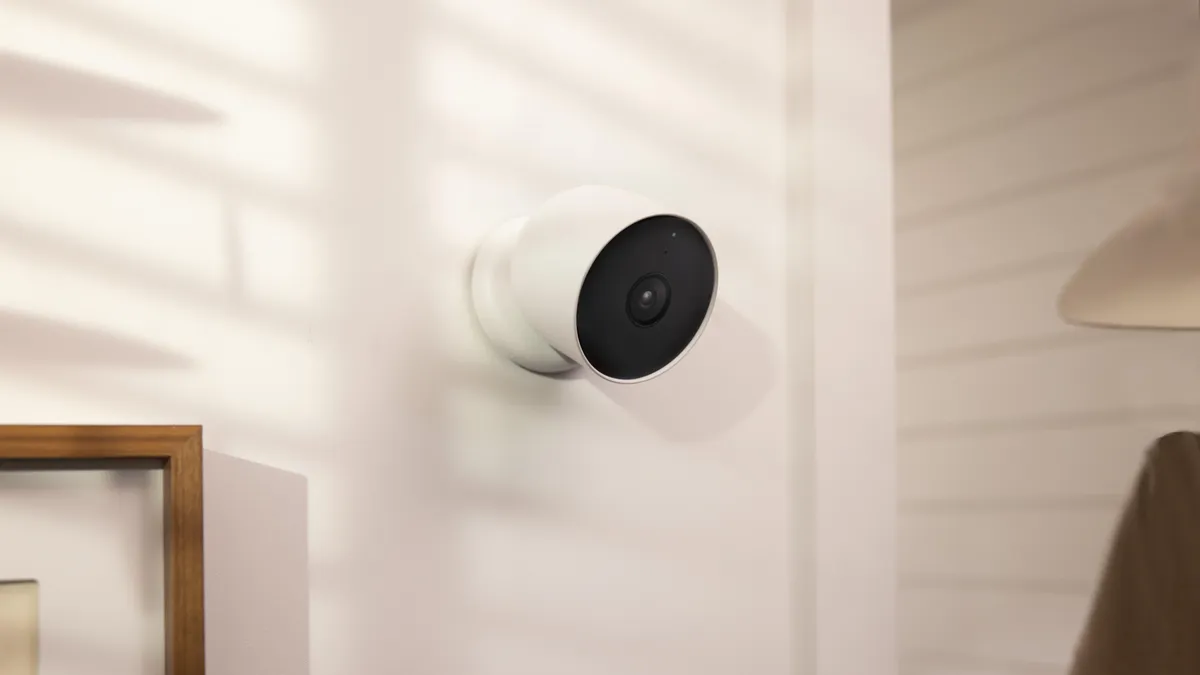
The method: Light the scene itself. Use the camera's built-in white-light LEDs, or add an external illuminator. Angle existing site lighting so it covers the field of view, not the wall behind it.
Why it works: Scene illumination is the cheapest performance lever in CCTV. A scene at 0.1 lux forces the camera into high gain and slow shutters. The same scene at 10 lux records clean color with low noise. Every 4x increase in light is roughly one full f-stop of sensor headroom.
The parameters that matter (typical): Built-in white-light fill typically extends color range to 20-30 m. External 850 nm IR illuminators push coverage to 30-60 m. One 20 W floodlight can outperform a camera upgrade that costs five times more. Angle the fill so it covers the field of view evenly. Use WDR, typically 120 dB, when bright fill light meets a dark background. Otherwise the subject becomes a silhouette.
The comparison: The same camera records the same yard two ways. At 0.05 lux with gain at 70, the image is grainy and faces are soft. With 5 lux of added fill light and gain at 30, the image is clean and sharp. For a perimeter or a car park, a few well-placed lights deliver more improvement per dollar than any camera swap.
Way 5: Tune Shutter Speed and Gain
The method: Adjust the night camera settings in the camera's web interface. That means shutter speed, gain ceiling, WDR and 3D DNR. Tuning night camera settings is the fastest free win on an existing installation. It costs nothing and takes minutes per camera.
Why it works: Shutter duration decides how long the sensor collects light for each frame. Gain decides how much the camera amplifies the signal. A slow shutter collects more light but blurs moving subjects. High gain brightens the image but amplifies noise into visible snow. The right combination keeps the subject sharp without flooding the frame with noise.
The parameters that matter (typical): For fixed scenes with little motion, 1/25 s is the typical shutter. For entrances with foot traffic, use 1/60 s. For vehicles and license plates, use 1/120 s to 1/250 s. Keep the gain ceiling around 50-70 so noise stays controlled. Enable WDR, typically 120 dB, for mixed lighting, and leave 3D DNR on. Buyers who search the phrase "low light camera improve" usually mean these exact settings.
The comparison: The same camera at 0.1 lux produces two different results. At 1/25 s with gain capped at 50, the frame is clean with a little motion softness. At 1/120 s with gain at 80, motion is sharp but the image is noisy. Neither setting is wrong. The choice depends on whether the camera guards a corridor or a driveway.
Way 6: Clean the Lens and Dome
The method: Clean lenses and domes on a schedule. Monthly for outdoor cameras, quarterly for indoor units. Always clean after storms, construction or a spray of insects. A clean optic is part of the spec, not a cosmetic detail.
Why it works: Dust, fingerprints, spider webs and haze scatter light instead of focusing it. That scattering produces halos around every light source at night. It flattens contrast across the whole frame. A dirty dome steals a large share of the effective light. On autofocus cameras, the haze can trigger continuous focus hunting.
The parameters that matter (typical): Use a microfibre cloth and lens cleaner on the glass. Never use a dry cloth on a dusty dome. Check the housing seal, rated IP66 on outdoor units, so moisture cannot fog the dome from inside. On IR cameras, keep objects 0.5-1 m away from the dome. Reflected IR otherwise blooms back into the lens. One cleaning pass takes about 10 minutes per camera.
The comparison: A dusty dome on a lit street records halos and hazy faces. The same camera cleaned records sharp faces at twice the identification distance. Maintenance is the cheapest upgrade in CCTV and the most skipped. A routine cleaning schedule often improves security camera night quality more than a new camera.
Way 7: Optimize Mounting Height and Angle
The method: Mount identification cameras at 2.5-3 m typical height. Use a 15-30 degree downward tilt. Never aim the lens into bright light. Repositioning is free and often the fastest fix on a site that already owns decent cameras.
Why it works: Mounting height trades coverage for detail. Higher covers more area but shrinks faces. A downward tilt keeps the sky and bright sources out of frame. The auto-exposure system then keeps the subject visible instead of exposing for the light behind it. Backlight is the classic night killer. A camera facing a sunset or a gate lamp records silhouettes no setting can recover.
The parameters that matter (typical): At 2.5-3 m with a 15-30 degree tilt, a 4MP camera identifies a person at roughly 5-8 m. A 6 mm lens pushes that to 12-15 m. For gates and vehicle entries, tilt 30-45 degrees down. Keep the lens clear of overhangs and branches that sway in the wind. Place the camera so its own housing does not block its light source. Outdoor-rated housings are covered in our outdoor camera range.
The comparison: The same camera mounted two ways proves the point. Aimed level into a yard light, the frame is blown out and faces are dark. Tilted down 20 degrees with the light behind the subject, the camera delivers clean face detail all night. Placement costs nothing to change. It can outperform a lens upgrade on an existing installation.
Night Vision Fix Comparison Table
The table below ranks the seven fixes by typical gain, effort and cost. That lets a site manager prioritize work. The three free fixes belong on this week's to-do list. The hardware decisions belong on the next purchase order.
The honest way to measure improvement is a controlled night test. Pick the worst-lit hour, usually 22:00 to 02:00. Record the same scene before and after each fix. Use a person in a dark jacket walking at 10 m as the test subject. Compare the two clips on the same screen, not on a phone. Most installers see the gain in the first frame. The settings fix alone often doubles usable identification distance.
| Fix | Typical night-vision gain | Effort | Typical cost |
|---|---|---|---|
| 1. Larger sensor | Up to 1.7x light per pixel | Spec decision | Part of camera price |
| 2. F1.0 aperture | 4x light versus F2.0 | Spec decision | Part of camera price |
| 3. Full color versus IR | Color evidence at night | Camera swap | Camera price difference |
| 4. Fill light | 1-2 f-stops of scene light | 1-2 hours install | 20-100 USD typical |
| 5. Shutter and gain tuning | Sharper or cleaner frames | 10-30 minutes per camera | Free |
| 6. Lens and dome cleaning | Recovers lost light and detail | 10 minutes per camera | Microfibre cloth only |
| 7. Mounting height and angle | Removes backlight blowout | 1-2 hours remount | Labor only |
← swipe to scroll →
Most sites should do fixes 5, 6 and 7 immediately because they cost nothing. Then plan fix 4 for the next budget cycle. Fix 3 arrives when cameras are replaced. Fixes 1 and 2 are factory decisions, so they belong in every new specification you write. A site that applies the free fixes first typically gains one to two f-stops of usable night performance without spending a dollar.
Integrator and Wholesaler Checklist
For integrators and wholesalers, night performance is a repeat-order factor. A line of cameras that fails after dark comes back as returns and support tickets. Use this checklist before ordering and before handing over a site.
- 1. Demand the sensor format on every quotation. Reject any spec sheet that lists resolution but omits sensor size.
- 2. Confirm the aperture. F1.0 for outdoor lines, F1.4 as the minimum acceptable fallback.
- 3. Verify minimum illumination in color, not just black and white, and treat 0.01 lux color as the practical target.
- 4. Test one sample in a real night scene before a bulk order, with a person walking and a vehicle passing.
- 5. Check the IR wavelength. 850 nm for range, 940 nm where invisible light matters.
- 6. Confirm WDR and 3D DNR are adjustable from the web interface, not locked to auto.
- 7. Run a night walk after every installation and keep the photos in the handover file.
- 8. Record shutter and gain settings per site in the customer handover document so nobody resets them.
- 9. Schedule quarterly dome and lens cleaning for outdoor sites and put it in the maintenance contract.
Wholesalers buying night-vision cameras by the container should ask for sensor size, aperture and minimum lux in the factory specification. Confirm ONVIF conformance for mixed-brand sites. Check the firmware update policy before committing to a line. Pair the night specs with resolution planning. Our megapixel IP camera guide explains how many pixels a scene actually needs. Our IP camera range shows the spec-matched options we build.
Keep a night-test photo from every site in the project file. Integrators who document before-and-after frames can prove the value of each fix. Wholesalers can use the same photos to qualify a camera line before it fills a container. A 5-minute test at midnight beats a week of returns. The same habit catches a bad sensor batch before it ships to a customer.
Night Vision Questions Buyers Ask
How can I improve night vision on security cameras?
Work through seven levers in order: choose a larger sensor, pick an F1.0 aperture, prefer full-color night vision, and add fill light. Then tune shutter and gain, clean the optics, and optimize mounting height and angle. Start with the three free fixes: settings, cleaning and placement.
Do IR cameras work in total darkness?
Yes. IR cameras illuminate the scene with 850 nm or 940 nm LEDs. They work in complete darkness, typically to 30-60 m at 850 nm. The trade-off is a black-and-white image. Color details like vehicle paint and clothing are lost.
What are the best night camera settings?
For fixed scenes use a 1/25 s shutter with a gain ceiling around 50-70. For entrances use 1/60 s. For vehicles use 1/120 s to 1/250 s. Enable WDR for mixed lighting and keep 3D DNR on. Test the combination on the actual scene, because every site differs.
Does a larger sensor really help at night?
Yes, and it is the single most reliable spec. A 1/1.8-inch sensor collects roughly 1.7x more light per pixel than a 1/2.7-inch sensor at the same resolution. That means less noise, longer color retention and sharper detail in dim scenes. If you track one number to raise security camera night quality, make it sensor size.
The Bottom Line
The fastest path to better night footage is free, and the biggest hardware lever is the sensor and aperture pairing. Tune the settings, clean the optics and reposition the camera first. Then specify 1/1.8-inch sensors with F1.0 lenses and full-color night vision wherever evidence quality matters after dark. Whether you manage one camera or a thousand, improving night vision starts with the scene and the spec sheet. It does not start with marketing numbers.
At FULLCOLORCAM we build 4MP and 5MP full-color night vision IP cameras with 1/1.8-inch sensors, F1.0 lenses and H.265+ recording. Every unit is tested before shipping, ONVIF-conformant and with free P2P remote access. Send your site details and camera count to cj226144@gmail.com for a spec-matched quote. We will tell you which of the seven fixes your building actually needs.
NEXT STEP
Ready to Upgrade to Full-Color Night Vision?
Send us your requirements — our team responds by email.
Written by
Ray ChanCCTV Buyer's Guide Author · Full-Color Night Vision Specialist. Ray helps global importers and integrators source factory-direct security cameras.